IFish Fishing Forum banner

Hog Line Quick Release Anchor Setup?

1 reading
20K views 38 replies 17 participants last post by  freespool  
#1 ·
Seen guys on anchor in hog lines hook fish and release their anchor from the rear of their boat. Wondering if someone could share how they set it up?
-It must be a fixed rope length so the end is in rear of the boat?
-What keeps the rope in the center of the bow.
-What prevents the rope end from hanging up on something on it's way out when released?
-Does it take a perfect anchor drop to line up even with other boats in a hog line? (Fixed Rope Length?)
Any details are greatly appreciated. Thanks.
 
#17 · (Edited)
I used to have a rope tied to a pin that, when pulled upward, would release the boat from the stern. I mounted the pin/rope receptacle to the vertical rails of the raised stern fishing deck (inboard engine).

It worked great but in the new boat I wanted to avoid drilling into the rails so here is what I do now. Like Positize, I don't use a net bag, I just tie the excess coils with some nylon mule tape.

I use the same yellow, floating (35'?) painter line and its black rubber shock absorber whether on anchor or if the snap link is snapped onto a metal hoop for throwing over a piling. When steep tug waves come it is nice to have that big shock absorber softening the shock of a bouncing bow and the little give a metal hoop on a piling has or, in deep water on anchor in strong current, it reduces the shocky motion which can loosen an anchor's grip. I slightly bent/flared out the starboard edge of the Miller Marine nest and smoothed it some with a round file to reduce wear on yellow painter rope.
Image


Image


Image


I thread it through the rail to reduce wear on painted windshield frame:
Image


Looking sternward:
Image


I tie with a slip knot to the vertical rail. Everyone is trained on my boat to know that the largest loop hanging in is the one to be yanked to release the boat.

This pic also shows one of my better adaptations... consciously buying motor oil jugs for the diesel Dodge truck that fit snuggly into the Thunderjet carpeted shelf. (Pennzoil FYI) This makes for a snug, quick to fill or rinse bucket, soapy water sink for lures etc, plastic dish brush rides inside. Cut juice bottles wedge in and hold marbles for sea lion ammo and fish scents neatly, securely and everything can ride down the highway at 75 mph and stay put.
Image


The end of the painter line is knotless.

CW
 
#3 ·
It's easy, just set your anchor and then just tie a over hand loop forward of the bow and hang the extra rope and buoy off the loop.
Then clip a floating rope into the loop and run it through the anchor bracket, then down the side of the boat to a rope clinch.
 
#4 · (Edited)
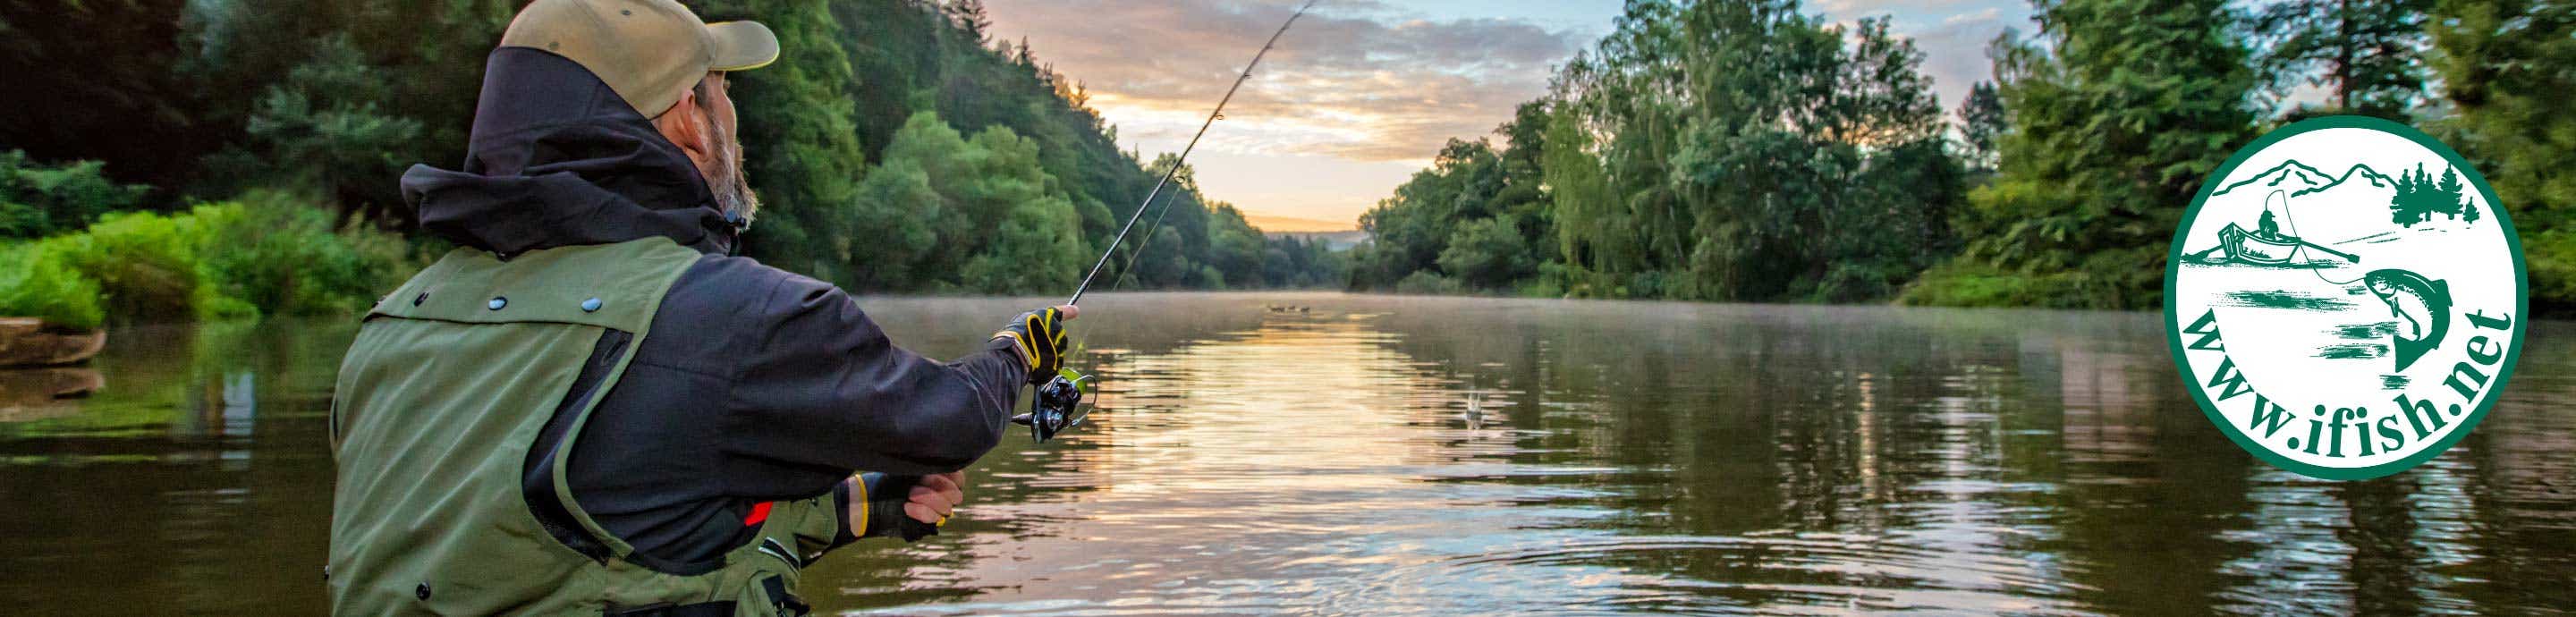
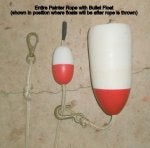
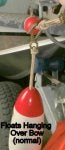
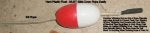
I have such a set up. I have a jam cleat mounted on my gunnel near the back of the canopy. I use a 25 foot piece of floating rop ( a painter), you can use Poly or West Marine has a hybrid floating rope stock that is more abrasion resistant. I spliced an eye in one end of that rope. I attached a small float, an A2, I believe, near the splice end, with a figure eight knot behind it to keep it from moving. I zip tied the float to the rope. The float suspends the anchor rope bag, which will sink if you have nylon rope like I do.

The anchor rope is managed using the standard rope bag that Bob's and fisherman's sell. I tie off the bag per the instructions, and then tie the knot in this article by Gundog ahead of the anchor bag (towards the anchor). I clip that knot to the spliced loop in the short rope. The bag will hang from the knot, and tension flows from the knot to the painter.

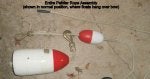
I have a second jam cleat near the front of the boat. When anchoring, we get the anchor set, tie up the rope bag in the right spot, then the rope bag and small float go over the bow into the water, and the painter gets tied off in the front jam cleat. We cleat the rope to the first jam cleat on the bow, and throw the rope over the side. It drifts back, we pick it up, put it in the back jam cleat, and undo the front cleat. The boat is now tied off by the back jam cleat. When you get a fish, you pull the rope from the back, it slides up through the bow chock, and we drift out.

I do not use an anchor nest. You need something to contain the short rope on the bow. Some guys modify their nest, I use an older style bow chock that you can get at Fisherman's or West Marine. CCW milled a notch into his nest.

This is the rope I use for the tie off rope. It's good stuff for this use. I used 1/2 inch, 3/8 works too, but half inch is easier on the hands.

Hope that helps. It's really handy and slick.
 
#5 · (Edited)
See my previous post:

1) you use a short tie off rope (yachting term is a painter) tied to your main rope.

2) a chock or modification to your anchor nest. I use a bow chock, Which you can get at Fisherman's or West Marine. If you have a cleat you could run it around the cleat.

3) The painter should have a spliced loop in one end, and nothing on the other, so it will slide freely. I spliced a thimble into the eye to carry the load better.

4) make the painter long enough so you have 10 feet or so of adjustment room. But it's not an issue, because you tie off the main rope bag at whateveer the right drop is, minus 5 or 10 feet, and then you slide back the last 5 or 10 feet after you attach the painter.
 
#11 · (Edited)
My approach is very similar to Silver Hilton's and Gundog's. With the biggest exception being that I use a couple sliding floats on the painter rope.

I learned this setup from a fisherman that had fished Oregon City since the 1930's. The advantage of the sliding floats is the extra flotation right at the end of your painter rope - so you know exactly where that rope begins as you pull back into the hogline.

When you are gunnel-to-gunnel OC-style, a floating rope will frequently disappear under the boat next to you and be hard to find. And in moderate to high current, a floating rope can go underwater far enough that it's very hard to see. So having a large, easy-to-see bullet float at the end of your painter rope is a nice safety improvement - and just plain convenient. There is nothing more dangerous than getting your rope stuck in your prop, and it's just too easy to do as you pull back in the hogline, fruitlessly searching for the rope you know is there.

ALWAYS WEAR YOUR PFD WHEN ANCHORING - NO EXCEPTIONS! Keep a sharp knife very nearby so you can cut the rope if everything goes to heck. Pulling back into a hogline is one of the most dangerous maneuvers in boating. I have personally watched people die during anchor drill - be careful. Rule #1 - wear your PFD. Rule # 2 - know where your knife is. I would strongly recommend you watch someone anchor in a hogline a few times, in detail, before attempting it yourself.

Be mentally prepared as you pull back in the hogline. If you hear that sickening clunk and your motor slows, then dies, you NEED to have practiced what you are going to do if the rope gets in the prop. On our boat, we keep a sharp knife on a pole so we can reach the prop and cut the line. Be ready to grab that knife: in moderate to high current you may have very little time before your boat capsizes. Be mentally ready to do whatever it will take to cut that rope in your prop. Practice exactly what you will do in advance and have a conscious plan. Keep in mind you may have setup everything perfectly on your ropes, but the boat anchored next to you somehow let 50 feet of semi-submerged line hanging out that gets in your prop - be ready.

A few extra details: I tie a bowline on a bite knot in the main rope and never use a bag: just neatly coil up the excess rope. My main large ball buoy float has a clip (to clip on the main anchor rope) and 3 foot rope tail tied permanently: this is what I use to tie around the excess coiled up rope. The painter rope is clipped to the main anchor rope at the bowline on a bite knot. Since I learned to do this old-school, I don't use a bag and don't use an anchor puller - it's just too easy to do it all manually with the right setup. BTW - not a fan of anchor pullers 'cause it's too easy to end up with the rope in the prop (did I mention how dangerous a rope in the prop is?)

I also like the Clamcleat Bollard up at the bow, just aft of the anchor nest. Convenient during initial tie-off, before the painter rope is deployed, and the rounded bollard is a great way to ensure the painter rope 'casts off' as you drop out of the hogline.

Here are a few pictures to show the construction of my painter rope.
 

Attachments

#12 · (Edited)
A few more detailed pictures on the construction of my 22 foot painter rope with sliding float.
Don't forget to clip on the extra bullet float shown in the prior post.
And wear your PFD... And know where your (sharp) knife is...

When you get a fish on, yank up on the painter rope at the stern jam cleat (shown in the last two pictures), and throw that painter rope up and overboard (to minimize chances of it getting caught on anything). As you float out, the painter rope will snake through your bow, around that bollard, and off you go to catch your fish. I do not have any other jam cleats mounted on the bow because that painter rope seems to be a magnet to find anything it can possibly jam on.

While you're landing your fish, the bullet float will slowly pull the painter rope float all the way to the end of the painter rope. When you pull back in the hogline (after catching your fish), the bullet float will now be easily visible and showing you where you can safely pilot your boat back into the hogline.
 

Attachments

#14 ·
Yes, I've always preferred the more expensive halter derby ropes since they are so strong, soft and supple. You never burn your hands if you forget to put on gloves when working with them (I've done too much of that, now I'm a whimp). But the halter derby ropes don't float as well, which is not much of a concern with the double float painter rope I showed above.

I'm not a big fan of the 3 strand ropes because they can be so hard on your hands, but I do agree a floating poly rope is a great way to go. I would think one of your best options would be something like a poly Supreme MFP 12 strand: very floatable, soft, stays supple (get one of the higher tensile strength brands).
 
#15 ·
Positize, the Olefin rope I posted a link to is the stuff. It floats, it's durable, and its fairly soft to the hand.

I prefer a three strand rope for the painter, because the strands bind well in the jam cleats I use, better than braided rope. Its also easier to splice for the eye.
 
#16 · (Edited)
You are so right that the jam cleat you use will determine which ropes work well. I converted to the Clamcleat 'Major' 002050-1 jam cleats some years back (when I started using halter derby rope). My braided painter rope above is about 20 years old and is a little bit worse for wear, but still doing fine. I had some other (smaller) jam cleats on my prior boat that did not work for the halter derby rope so I had to change out the jam cleats when I quit using the 3 strand - details matter.

One more thing, Silver Hilton: thanks for the pointer to that Mantus 13 pound anchor. My old Columbia River anchor was right around 40 pounds to hold well - a 27 pound weight reduction makes manual anchor retrieval feel like I'm cheating. Sweet.
 
#18 ·
Very easy to do.....put the ball on the outside nose if the boat in the water. Then have a secondary rope the length of your boat that will either come over at the nose or a side cleat. Make a half wrap around the cleat in the bow and then down the side of the boat. Install one of these on the side:
https://nautos-usa.com/products/sma...m=cpc&utm_source=googlepla&variant=28259064905&gclid=CLTmzvTPsNICFYNsfgodfb8NEw

Clip the rope in and you're set. By making the 1/2 wrap around the bow cleat you're taking the tension off of the side cam. When you hook a fish, yank on the rope and it slithers off the front as you drift back. Very easy to install for $15 bucks.

tc
 
#19 ·
CCW: nice setup. Some great ideas. I think I will add that shock absorber to my painter rope.

To ensure the rope has a consistently smooth path through the anchor nest, and to give you the flexibility of running the painter rope on either port or starboard sides, you might consider adding one of those Clamcleat 208 Bollards just aft of the anchor nest like I show in my pictures above. On my boat, the bollard is mounted so both anchors (the Mantus and the Columbia River Anchor) just clear the bollard. The round sides of the bollard guide the rope reliably through the anchor nest (no need to file/smooth the anchor nest), plus it gives you an easy-to-use jam cleat while you're first getting everything set up. Does require drilling holes in your deck just behind the anchor nest.
 
#21 · (Edited)
Octrollin: I'm guessing you don't fish solo in a hard topped boat.

Silver Hilton was mistaken. I didn't have to mill out a notch, just softened the sharp edges of the anchor nest. I'm glad I talk with him regularly, I miss his thoughtful and significant contributions here.


Positize- post a pic with your rope through it . Does it rotate? I don't need to run my painter down the port gunwale. The plastic gas cap is there complicating that some. I can still chock off of either side of the bow to hedge boat's position considerably. But need to come up with a better solution than the one cleat clamped to the port side rail. I'll try to get a pic of it so we can explore chocking options.

CW
 
#27 ·
Thanks to all the great ideas on this! I am currently finalizing my new setup and will post pics when complete. I am incorporating a snap shackle in my set up. http://www.scuba.com/US/scuba-gear-...98/230928/Innovative-Halyard-Snap-Shackle.html?gclid=CPvts4uks9ICFVCBfgodFcUKqw
The shackle will be on a fixed piece of rope attached to bow cleat over the bow. The main anchor line will be attached to shackle, w/ xtra rope in float bag and big ball all over the bow. The pin pull line will run up the side accessible from the rear of the boat to pull trip the shackle dropping everything in the water and off anchor.
 
#34 ·
Mag eze.... I don't anchor fish much but this little elctro magnet works great..... it was a gift so I put it on..... when my boys where young it was a blessing!